Friday, December 23, 2011

Journal Pages


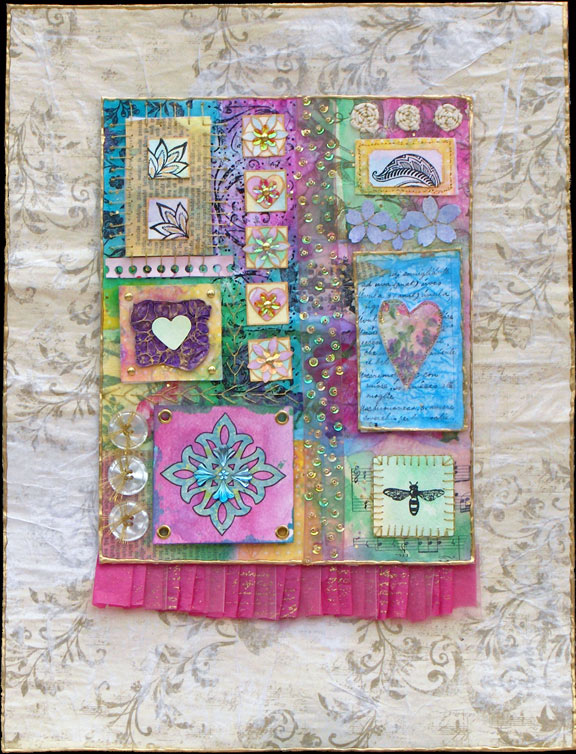
Another couple of pages.  Naturally I have only photographed the pages I like.  Maybe someday I'll get brave enough to post the uglies too.  First I have to accept that they exist!  Some of the collage elements on the Crazy Love page came from Kelly Kilmer.  I took one of her on-line journaling classes and she gave the class collage pages.  The other page was a result of testing various pens and inks I have in my stash to see how they felt to write with and how waterproof the ink was.  I also played with an edge punch on this page.  It's kind of a messy page but I like it for some reason.  I have a terrible time finding pens I like for journaling.  Half of the ones I try won't write over paint and glue.  Most of them aren't waterproof and I always end up regretting that fact.  The best pen I've found so far is my Copic marker but I don't like the chisel tip or the brush tip for most things.  I bought a fine point Copic pen but it doesn't seem to work as well.  Other artists swear by this pen or that but I have not had such good results.  Maybe it's because I live in such a dry climate.  There's nothing like an early morning blog ramble about pens huh? 

Sunday, December 18, 2011

Journal Pages


Here is another page from my smaller art journal.  One of these days I'll get organized to take pictures as I complete pages, or at least I'll make some effort to post pages in order of completion.  Right now it's just an accomplishment if I get something posted!  I actually completely filled my larger art journal recently - the first one!  I'm not sure if it's complete or not since there are pages I'd still like to do more with, but it will take time to tell.  I do art journaling sporadically as I'm still trying to make up my mind why I'm doing it in the first place.  At the moment I'm trying to use this smaller journal for working ideas for new artwork which makes for rather ugly journal pages but I'm trying to get over that.  Do you ever want to get past the stage of figuring **it out and finally understand your own process?  I do!  But then again, learning is fun too.  Waffle anyone?

Saturday, December 10, 2011

Color Studies


These are pages from my art journal.  I decided to collect images in color schemes that I don't normally work with and make a collage with them.  All these images and scraps came from magazines or catalogs, with a few bits of scrap paper thrown in.  I am so often disappointed with my journal pages but I ended up really loving these collages.  It was a great way to change my perception of these colors.  Now I find myself using orange and yellow green in more of my work.  These could also make fun concepts for a art quilt.  Hmmmm.

Leda's Flowers

Here is a new piece that I finished a little while ago.  Getting the pictures taken and edited for posting takes me forever!  The down side of bloggin! LOL.  This began with a piece of fabric-paper in shades of red and purple, which is a favorite color combination.  So many of my pieces begin after experimenting with a technique I want to try and this is no exception.  This is a remnant of my first piece of fabric-paper, made a couple of years ago.  I also wanted to to try printing images on silk.  I chose one of Leonardo da Vinci's drawings and was really pleased with the way it came out.  This piece includes embossed velvet (so much fun!), embroidery, beading, and stamping (with acrylic paint).

Sunday, August 14, 2011

Black Flowers

Here is a new mixed media piece that I recently completed.  In the March/April 2011 issue of Cloth Paper Scissors magazine there was an article by Susan Pickering Rothamel and Frankie Fioretti about making restructured paper using Perfect Paper Adhesive.  As a collage artist and art journaler I had about a ton of scraps so I thought this project would be just right for me.  I was totally thrilled with the outcome but could not decide for quite a while what I wanted to do with it.  It was so pretty just the way it was that I considered calling it finished but in the end I decided to try adding some flowers.  I did all this work creating and stitching down some paper flowers and hated the way the looked.  LOL!  So I carefully cut the shapes out, leaving square flower shaped holes.  I like the way the collage paper looked on a background of black brocade so I added some batting to the back, secured the whole shebang with fusible webbing and stitched it down with gold thread.  The flower centers are pieces of black card stock that I cut, folded, and edged with gold Smooch ink.  I mounted the whole thing on a small canvas that I painted with various antique-y colors, and stenciled with punchinella.

In this detail picture you can see some of the black on black brocade and the little gold spiral I stitched in various places.  The Perfect Paper adhesive is really great to work with and I find myself using it in my journals as well.  My pages don't stick together like they do when I use matte medium.  Yea!

Saturday, August 13, 2011

Art Quilting Studio magazine

I had the great privilege to be published in the summer 2011 issue of Art Quilting studio which Stampington and Co. just began re-publishing this year.  When I saw that they had a call for entries I only had one week left to get something off to them so I quickly put everything together and stuffed it in a box.  The only photo's I had were terrible and its taken me forever to get around to taking some better ones.  This piece began when I decided to try out some techniques using crumpled craft paper and painted wonder under.  It just went from there until I found myself embroidering through several layers of paper and fabric.  Whew!  that was a chore.  The mountains at the bottom are made of painted tyvek and paper towels! 

Saturday, July 30, 2011

Scrappy Collage


I made these collages using Perfect Paper Adehesive and scraps from my studio.  The technique was shown in an article in Cloth Paper Scissors Magazine and it looked like such fun that I had to try it.  I adore the results!  This was actually one large collage but it only fit on my scanner in two separate sections.  This project caused me quite a quandry.  It looked so beautiful to me just as it is and yet at the same time I felt that I needed to do something with it, add something to it.  How do you know if a piece is enough or if it needs more?  This question plagues me constantly!  In the end I decided to use the collage in an art quilt that I'm currently working on.

Sunday, July 24, 2011

Autumn Flowers art quilt

I recently completed this art quilt that I made to go in my new office.  Our offices relocated recently and the new building is painted in all these autumn colors.  My office has a gold accent wall and since autumn colors are not my favorite color choice I had to come up with something new to go on the walls.  While helping a friend move I was gifted with a piece of rayon fabric that was printed in a patchwork design in colors I knew would be just perfect to go on that gold wall!  I began by quilting the fabric with gold thread.  That really made the patterns pop!  I had placed red velvet behind some of the squares and after the quilting was done I cut out part of the rayon to show the red velvet in a reverse applique technique.  Then I decided to paint matte medium along the cut edges and coat them with gold glitter.  What a messy process!  I made some fabric paper in coordinating colors and cut out the rosette pieces which are glued down and then I placed tulle netting over them and stitched it down to ensure that the little pieces didn't lift up.  The little metal squares are made of foil candy wrappers fused to felt.  The large flowers were cut out of a wool blanket and stitched on with gold thread in a blanket stitch.  The centers of the flowers are made of candy wrappers and gold buttons.  I edged the quilt in gold cording and a copper eyelash yarn and mounted the whole thing on brown velvet stapled to a framed canvas.  It looks just great in my office!  Here is detail image:

Saturday, July 23, 2011

Beryl Taylor workshop


In April I took a workshop presented by Beryl Taylor who happens to be one of my favorite artists.  Her book Mixed Media Explorations is what really got me started working on my own art.  She invented fabric-paper and I just couldn't wait to try it.  The workshop was a lot of fun and Beryl was so generous with her knowledge and art supplies.  We created three pieces during the workshop although I didn't actually get them finished until I got home.  The piece shown here is a small wall hanging that took me quite a while to finish.  It is created from fabric-paper, watercolor paper, stamps, embroidery, buttons, sequins and beads.

These are the covers for a min-book we made.  It is about 3 inches square.  Here you see some copper and aluminum tape that have been embossed and colored with alcohol inks.  Working with metal is the only thing I had not done before taking this workshop.  The rest of the pages of the book follow.  They are made with fabric-paper, felt, book pages, fabric, stamps, embossing powder, copper, etc. 


The last project we worked on was a steampunk quilt.  This is my least favorite of the three pieces.


Sunday, January 23, 2011

Strathmore Visual Journaling Workshop 1, week 3

Week 3 of the Strathmore Visual Journaling workshop went better than week 2.  I added color to the background, included some stenciling and stamping and graphite pencil.  Much to my surprise an 8B pencil went over the oil pastels really well.  Some of the other workshop participants are doing really great work.  Much more "art" than my page.  LOL!  Sometimes silly and simple is just fun and its all a great way to practice and learn.  One more week of this workshop to go.

Saturday, January 15, 2011

Strathmore Visual Journaling Workshop 1, week 2


The visual journaling workshop homework this week consisted of adding charcoal and oil pastel shadows to our collaged work.  After that we were to add watered down gesso and another layer of oil pastel.  Before I got started with my homework I decided to add a couple of hearts using more of the background I copied and printed and used for the "ground" last week.  I have a vague idea for flowers or something I suspect will be silly and insipid but cute anyway.  Sadly week 2 did not turn out so well for me.  When I collaged the elements in week one I used gel medium and a brush and didn't worry about getting gel outside the edges of the collaged papers.  After all, it dries clear and can be worked over right?  Well the charcoal and oil pastel don't look so hot over the brush strokes left in the gel medium and the whole thing ended up looking kind of dirty.  However, I have faith that this piece can still be worked into something worthwhile.  And after all, the point of taking this workshop was to learn and have fun so I know I will succeed.

Sunday, January 9, 2011

Strathmore Visual Journaling Workshop 1, week 1

Strathmore Artist Paper is offering three free visual journaling workshops to promote their new line of mixed media workbooks.  The instructors are terrific and hey, it's free!  The first workshop is being taught by Pam Carriker.  This is the start to my first journal page made for the workshop.  We are supposed to be recycling our own artwork for use in new ways but I didn't have anything I liked well enough to recylce except for a background I created but haven't used yet.  The collaged element at the bottom of the page is from a printout of that background.  Everything else is cut from magazines.  We will be adding more to the page in weeks to come so hopefully this will become more "mine" as I go.  I chose to work in a smaller book so the pages wouldn't take so long to complete and since the page was small I decided not to add to much to it at this stage.

Friday, January 7, 2011

Cloth Paper Scissors 2011 Calendar - Interweave


I was lucky enough to be a winner in the Cloth Paper Scissors 2011 Calendar contest.  My artwork was chosen for the month of February.  This is a picture of my piece.  This was only the second time I have ever sent a piece of artwork to a contest so it was really exciting to be a winner.  The prize pack they sent was fabulous too!  My inspiration came from Medieval books of hours.  It is a mixed media piece made from fabric-paper, paint, beads, machine stitching, hand embroidery and painted fabric.

Cloth Paper Scissors 2011 Calendar - Interweave